The WordPress Editor Novice Novice tutorials require no prior knowledge of any specific web programming language.
The WordPress Text Editor includes three sections: the Visual Editor, the HTML Editor and the Media Uploader.
- Click the Visual tab at the top right-hand side of the text editor box. The first row of options displays the most useful icons and their functions.
Starting from left to right:
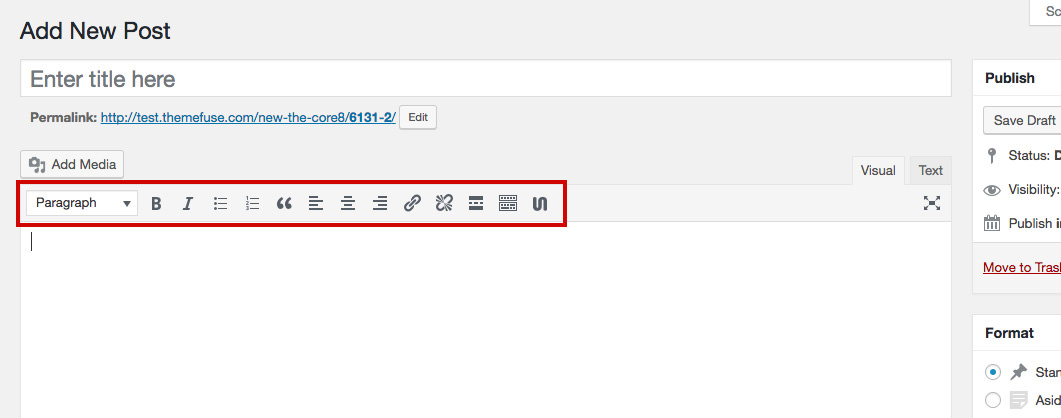
- Paragraph/Heading - Choose the type of paragraph or heading you want to write with.
- Text Editing Tools - Bold, Italic, Strikethrough, Unordered and Ordered lists, Blockquote, Separator, and Align (Left, Center, Right).
- Insert, Edit and Remove Links - These two buttons allow you to create/edit or remove a hyperlink. In order to insert a link, you need to click on the Insert/Edit link button with the relevant text selected in the editor. The same applies for the Remove Links button.
- Insert More Tag - This button allows you to cut off that part from your blog post that you want to be displayed on the home and/or archive pages.
- Toggle Toolbar - This button toggles the second row of options
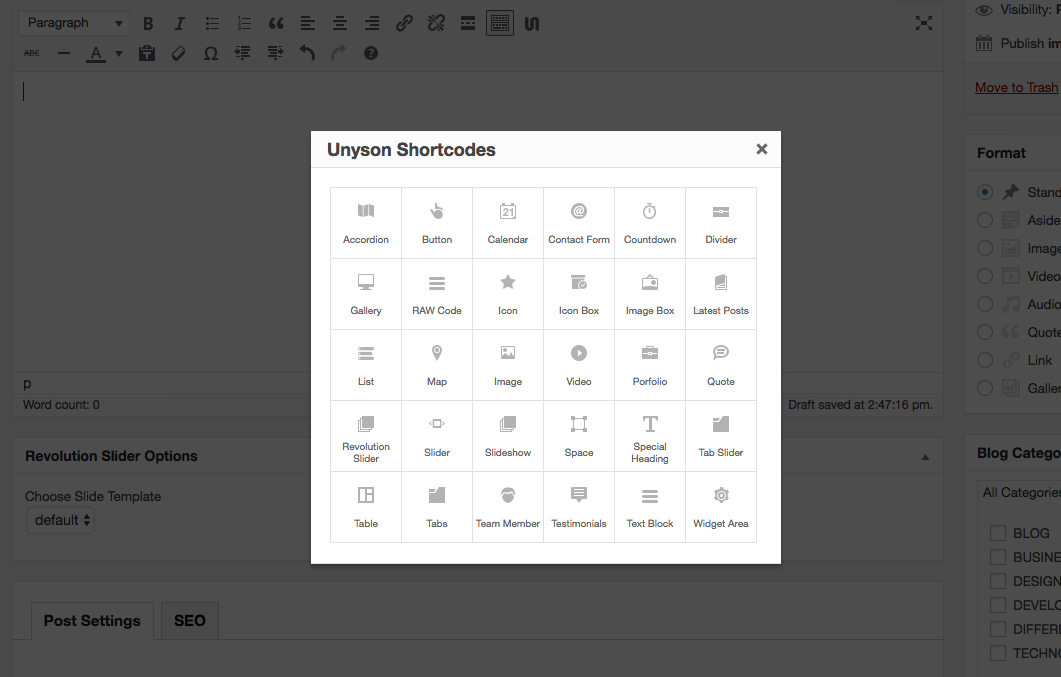
- Insert Unyson Shortcode - This button lets you insert shortcodes from the visual page builder directly into your text editor
Information
You'll find this Insert Unyson Shortcode button in all the text editors across the theme. Switch to Visual Editor and add shortcodes directly into the text editor.
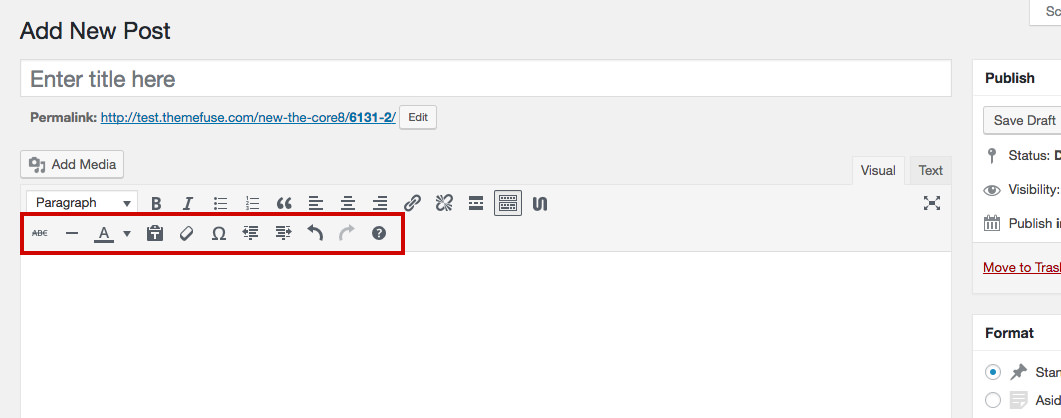
- Strikethrough - This button will strikethrough your text.
- Horizontal Line - This button will insert a horizontal line into your post.
- Text Color - This option will let you change your text color.
- Paste As Plain Text/ Paste From Word - This button will help you with editing the information you have selected from external sources.
- Clear Formatting - The formatting button removes all formatting: italics, bold, colors from a highlighted section of text.
- Special Characters - By clicking on this button you can insert special characters and symbols in your blog post if needed.
- Increase/Decrease Indent - By clicking one of these buttons you can increase/decrease the text-indent from your blog post.
- Undo/Redo - You can Undo or Redo actions by pressing one of these buttons.
- Keyboard Shortcuts - Rather than reaching for your mouse to click on the toolbar, use these access keys (Windows and Linux use Ctrl + letter. Macintosh uses Command + letter)
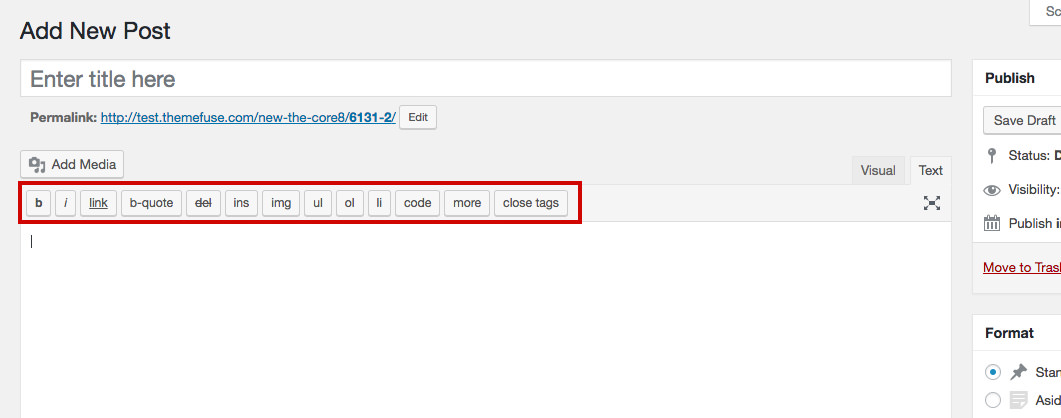
- The Text tab supports HTML and the most frequent used tags are here for you to use. From making the text bold and adding a link to adding lists or images.
- The Media Uploader is used to add images, photos, and galleries to your blog post.
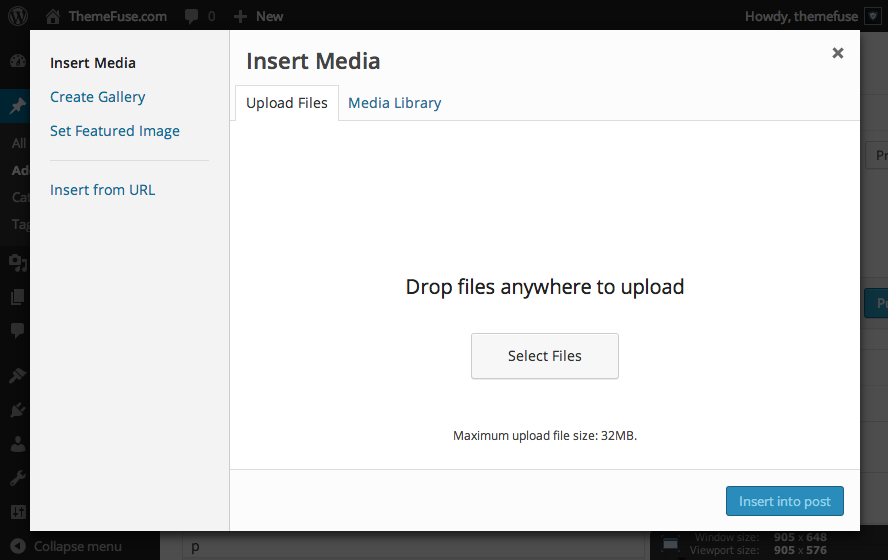
Information
Find out more about using the Media Library. You can also check out how to add an image to your blog post.
How to create a link?
You may want to link to websites on the web, or to other pages on your own site to provide additional information for your readers. Or you may want to use an image as a link. The generic video below will help you learn how to create links in WordPress.