Building Custom Menus Novice Novice tutorials require no prior knowledge of any specific web programming language.
Go to the Appearance > Menus in the sidebar in order to load the Menu Editor page. From this page you can control anything related to your website menus.
Create a new menu
- Click the create a new menu link at the top of the page.

- Enter a name for your new menu in the Menu Name box.
- Click the Save Menu button.
Adding items to a menu
Once a menu is created, you can add items into it. On the left column you can find different custom links, pages or categories that can be added to your menu.
- Select the Pages tab.
- Press the View All link to bring up the pages published on your website.
- Select the Pages you want to add by selecting the checkbox next to each Page title.
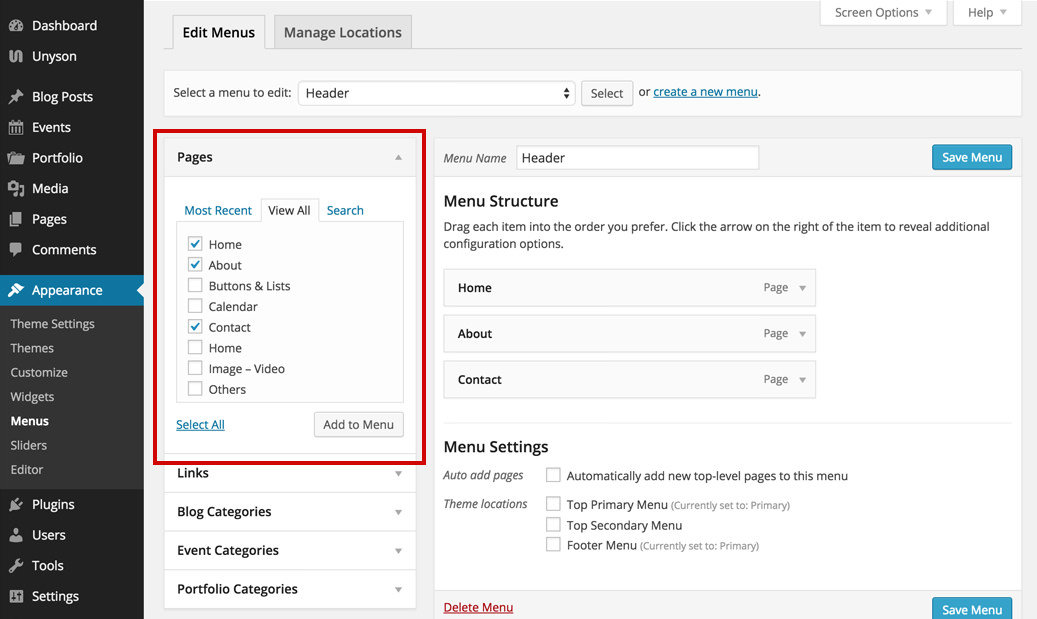
- Click the Add to Menu button to add your selection(s) to the menu that you've just created.
- Click the Save Menu button on the right hand side once you have added all the menu items you want.
Deleting a menu item
- Select the menu item that you want to delete from the menu editor screen.
- Press on the arrow icon in the top right-hand corner of the menu item/box to expand it.
- Click on the Remove link. The menu item/box will be immediately deleted.
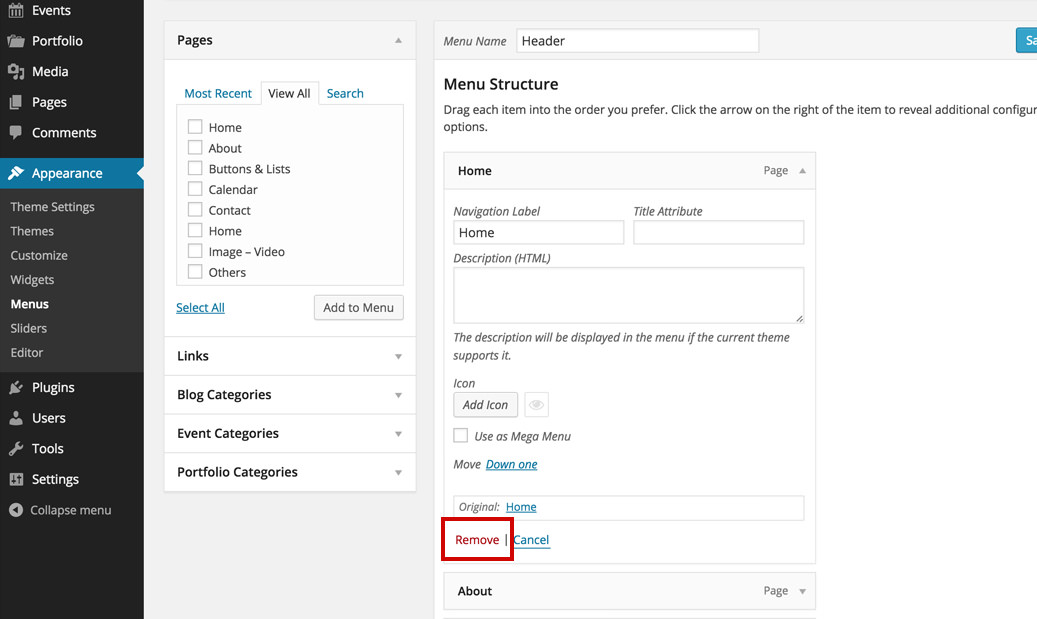
- Click the Save Menu button on the right hand side to save your changes.
Customizing menu items
Each Menu Item includes a configuration panel. Click the small gray arrow on the right side of the item title to open it. You may temper with different options depending on the item menu:
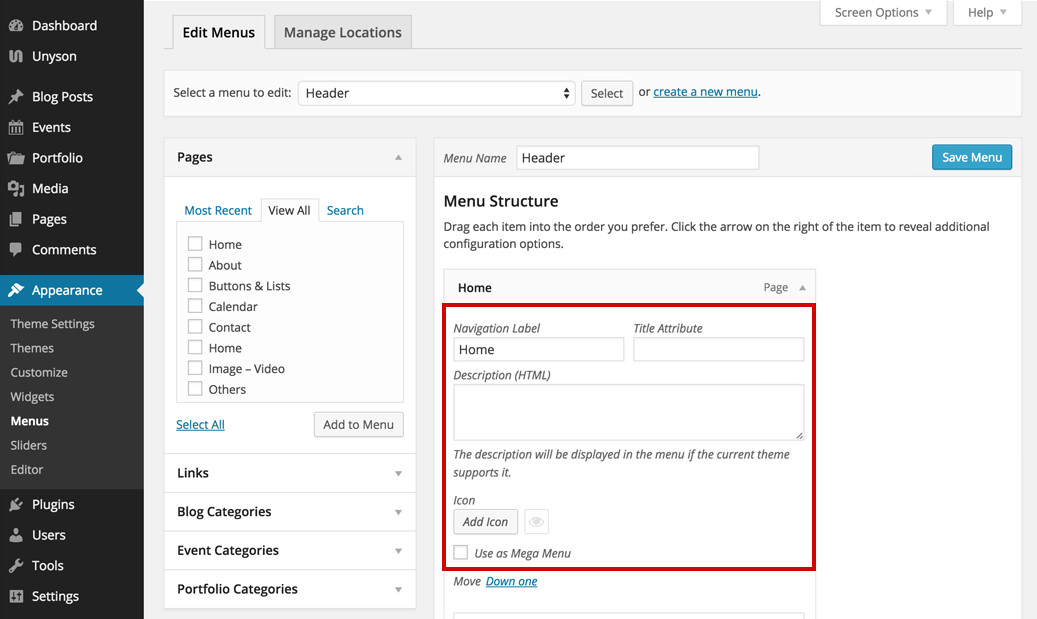
- The Navigation Label - what your readers will see when visiting your website.
- The Title Attribute - this text will be shown when the user’s mouse hovers the menu item.
- Description (HTML) - this option is not supported by the current theme.
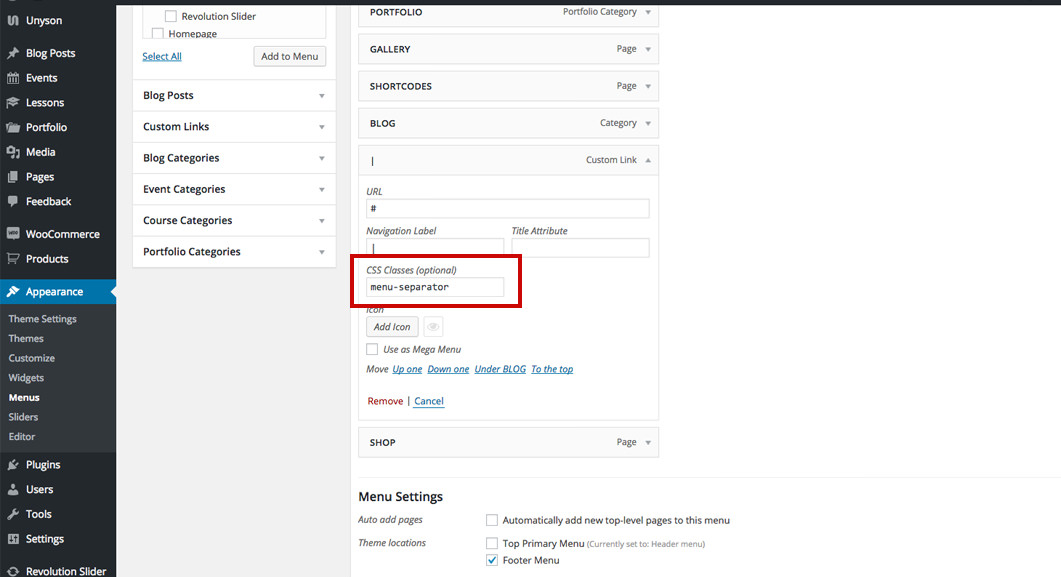
- CSS Classes - lets you further style a menu item using CSS. By default this option is not visible, you need to enable it from Screen Options panel on the top.
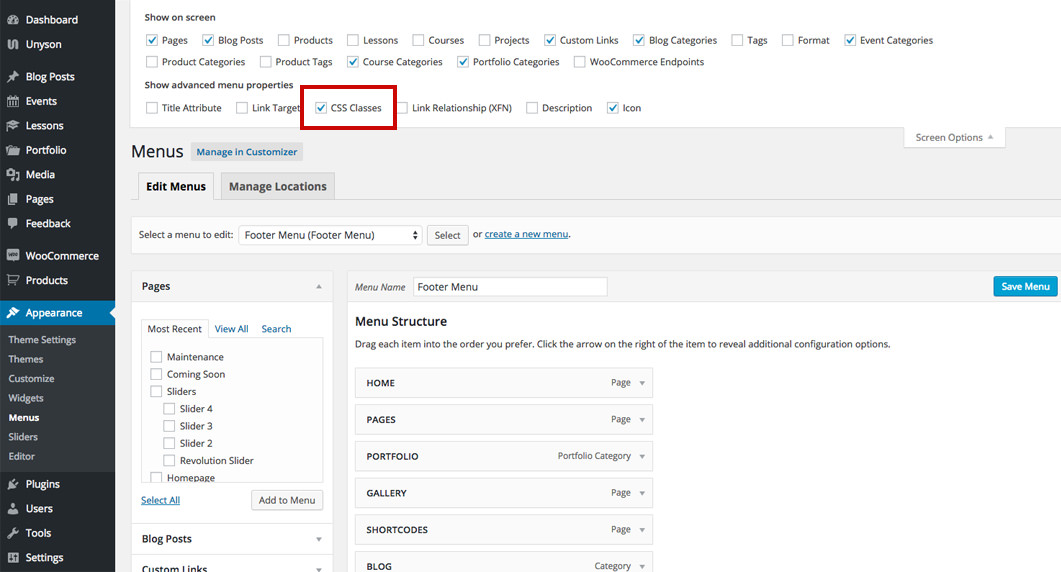
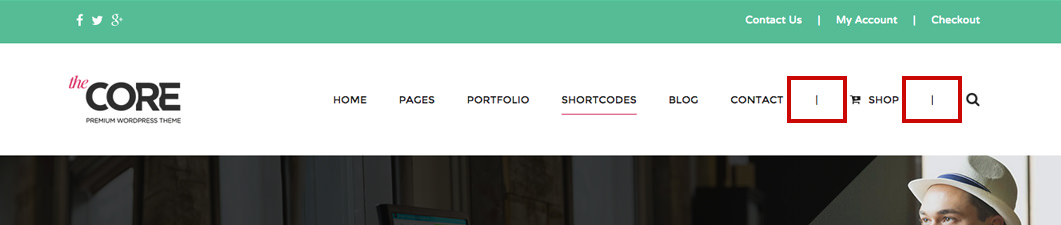
This theme comes with a ready to use CSS class: menu-separator. Use this class if you want an item to act as a menu separator. What this class does is strips down all the css related to a menu item: link, hover color, etc.
Back-end
Front-end
- Icon - lets you add an icon to your menu item.
- Move - use this option to change the item's position in the menu.
Once you have finished, press the Save Menu button to save your changes.